Overview

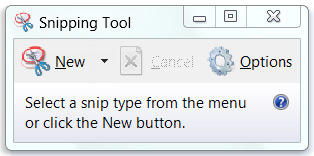
The Snipping Tool is a screen capture utility included in Windows. It can take screenshots of an open window, rectangular areas, a free-form area, or the entire screen. Snips can then be annotated and stored as an image file. Snipping Tool allows for basic image editing of the snapshot, with different colored pens, an eraser, and a highlighter.
Where is the Snipping Tool?
- Click the Windows start button on the taskbar.
- Type Snip
- The results should display the Snipping Tool
Types of Captures
You can capture any of the following types of snips:
- Free-form Snip - Draw a free-form shape around an object
- Rectangular Snip - Drag the cursor around an object to form a rectangle
- Window Snip - Select a window, such as a browser window or dialog box, that you want to capture
- Full-screen Snip - Capture the entire screen
After you capture a snip, it will automatically show up in the tool window. From there, you can annotate, save, or share the snip.
How to use the Snipping Tool
Capture a screen shot
Click the arrow next to the New button, select Free-form Snip, Rectangular Snip, Window Snip, or Full-screen Snip from the list, and then select the area of your screen that you want to capture.
Annotate a Capture
After you create a capture, you can write and draw on or around the snip in the tool window.
Save your capture
After you have made a capture, click the Save Snip button in the tool window. In the Save As dialog box, enter a name for the snip, choose a location where to save the snip, and then click Save.
Email a Capture
After creating a capture, click the arrow on the Email icon button and an new Outlook message should appear.
Capture a Menu or Other Items that Disappear
- Open the snipping tool and leave it running
- Click new from the tool window and hit the escape (Esc) on the keyboard
- Then click the menu or item so it appears
- Press "crtl + print screen" on the keyboard
- Select the area you want to capture
- You should now have the capture